
First things first. Since I was last here, I have become an independent demonstrator for Stampin' Up. I'm very excited about this, and hope to share some cards with you in the near future. If you want to take a look at my website, it is http://beckypartan.stampinup.net/. There you can look at my blog or order online. My Facebook page is Becky's Stampin' Up FacebookPage. Hope to see you there.
Now, on to other important things. :-) After watching Jennifer McGuire's video on using Distress Oxide Inks, I purchased some. Then I watched her video a couple more times. Then I decided to play with MY Distress Oxide Inks. All I can say is WOWZA. How much fun.
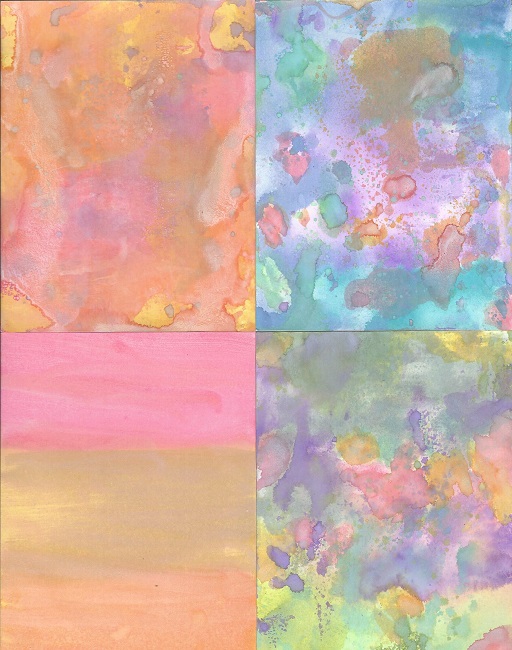
All of the following samples I used Neenah solar white cardstock or Bristol cardstock.

I spent all of Sunday afternoon playing with these inks. The first example above with the flower, I sponged the Distress Oxide Inks (DOI) onto Neenah solar white cardstock. Then I took a stencil and a baby wipe and removed some of the ink. It gave it a very soft appearance.
On the example with the tee shirt, I again sponged DOI onto solar white cardstock, then I inked up my stamp with water and stamped. I blotted the wetness with a paper towel, again removing some of the ink. It also gave it a soft look.
Because these are a hybrid ink (dye and pigment), they react with water in a beautiful way. I didn't use my heat tool between adding colors, but I did allow them to dry naturally after each color. Because they were dry, the colors didn't get muddy when you added the next color.
The bottom right shows a piece of cardstock where I just put some of the DOI onto a piece of acetate, added water, then flicked onto my paper with a paintbrush. I love how it looks, and think it will be fun to diecut birthday sentiments out of it.
Below are some of the other fun backgrounds I made.

The bottom right used the two colors of brown and some of the cracked pistachio. I think it gave it quite the oxidized look, don't you agree?

The top right background was just sponged inks that I blended without any water. These inks blend beautifully.
Some of the backgrounds I put the ink onto acrylic blocks, spritzed with water, then smooshed onto the cardstock. As long as you let them dry between colors, you won't ever get a muddy look. Some of these were also just sponged on and blended.
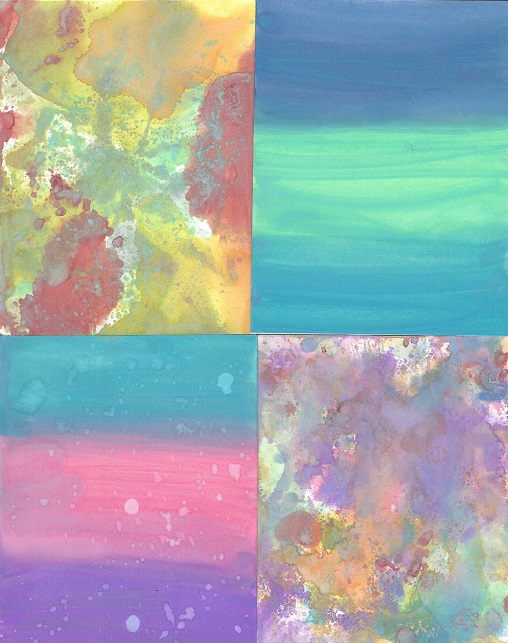
The bottom left was sponged on, then water flicked onto the background. I love the oxidized look.
I had so much fun and really look forward to making cards with these beautiful backgrounds and playing some more.
I hope you've enjoyed my post today.
Inky hugs,

Wow! Your were VERY busy! They are gorgeous papers, and such beautiful colors, too! No wonder your played all day Sunday! Thanks for sharing your creative process, step-by-step, Becky.
ReplyDeleteCongrats on your new SU gig! Best wishes for much success!
hugs,
de
Love the backgrounds you did Becky - some fab results - I would hate waiting for each colour to dry - thanks for the test results - good luck as SU rep
ReplyDeleteBecky, looks like your had fun and got some really neat backkgrounds.
ReplyDelete